
The image above is the a sketch of the creature that I am going to make a 3d model of in max. This is just a rough sketch of the creature, which I have named sack man because I am going to eventually model it with a sack like texture. My inspiration for this type of creature design is the typical scarecrow that you find on your average farm because there's something about the way they look that is really creepy.

Here is a rough sketch of what I would like the different parts of my creature to look like, as you can see I have done cross hatching all over the limbs so that it starts to look like the texture you would find on a sack.
 This is an image of my Sack creature sketch that I made but with this image I added colour using Photoshop. I did this so that i could get a general idea of what kind of textures I would like to use on my 3D version. The sack texture I have used on this image is one that I found on the internet but I changed it in Photoshop so that it fit my idea better.
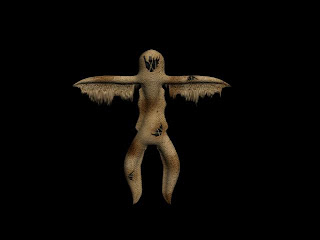 This is a render of my Sack creature that made in 3ds max, as you can see I have made the 3D model look almost exactly like my design idea. I am really happy with this model because it turned out how I wanted it to turn out without the process being too difficult. I didn't come across any problems while I was making the model which I believe is down to the planning I did and my abilities in Photoshop and 3ds max. To make this model I first used the cylinder standard primitives to get the basic body and limbs positioned for modelling. After I did this I started to edit the shape of the cylinders using the editable poly modifier to get the shape I wanted for my creature. After I finished editing the shape of my model I attached the everything together into one object (arm and legs to body and head), I began with the process that I found the hardest to do during the development of this model, the texturing. The first thing I had to do was unwrap the model using the UVW text unwrap modifier, which was an annoying process, after I did this I began to make the texture for the model in Photoshop, which I would then apply to my model. Below is an image of the texture I made for my model.
No comments:
Post a Comment